How To: Create Custom PDF Forms
We all have specific needs when it comes to how we operate. Customization isn’t a luxury anymore, it’s a necessary tool that helps us work more efficiently. Get a leg up on streamlined workflows by utilizing the (long-anticipated) custom PDF form builder feature in Nymbl Systems! It only takes a few minutes to get set up – just follow the directions below.

What Custom Forms Allow You To Do
- Upload Editable/Fillable PDF forms
- Map values to be auto populated from within the Nymbl System
- Open up the form within a patient profile
- Generate a copy of the form with or without pre-populated values
- Edit the forms right in the browser
- Add signatures on the forms
- Save the form right in the browser without having to save it to your device first
- View and open the from within the files and document section
Getting Started
Rather watch a video? Follow this link to learn to set up and map your editable PDF forms. Follow this link to learn to complete and save out the PDF forms to a patient’s chart
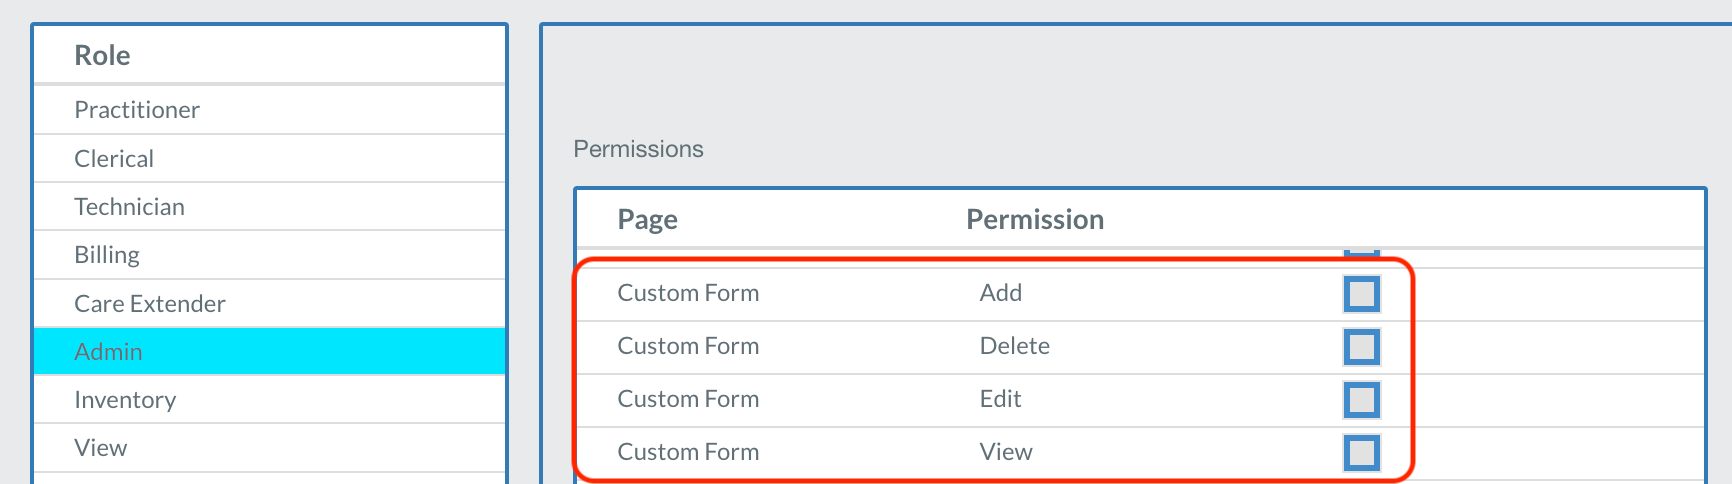
Prep: This is a permission based feature. Please ensure you have the permission turned on by going to Maintenance > Branch/Company > Users or User Groups and selecting the "Custom Forms" permissions: Add, Edit, Delete, & View.
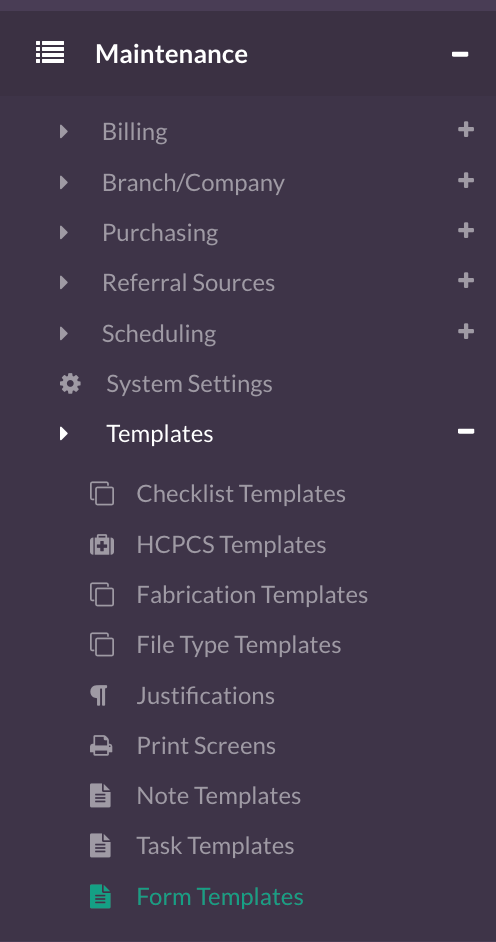
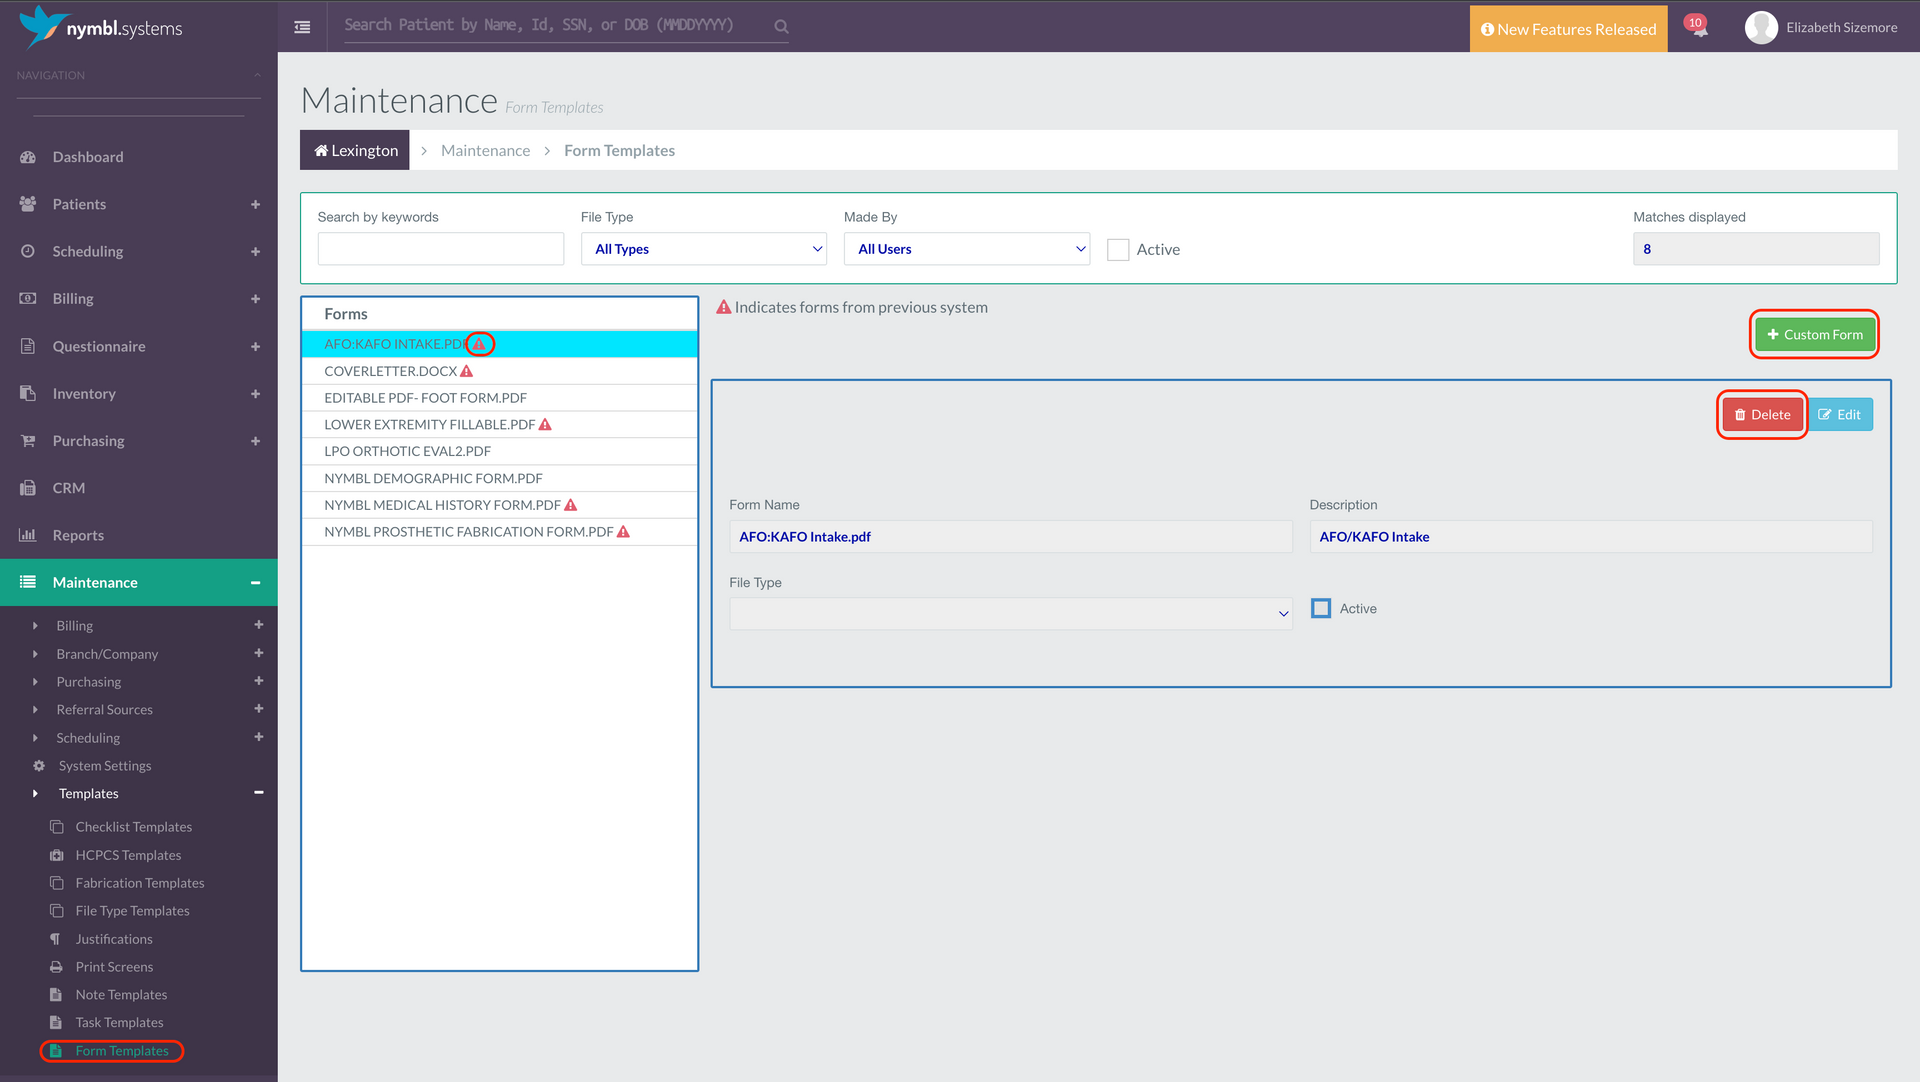
Once you have the permission turned on, go to the Maintenance → Templates → Form Templates. (If you don't see it yet & you have permissions on, log out and then log back in & you should see it at the bottom.)
Existing Custom Forms that have been previously uploaded will be displayed on the left with a red triangle icon next to them to identify they were uploaded before this feature.
(Please note: If any of these forms are editable PDFs & you'd like to utilize the editable PDF feature, these will need to deleted first by clicking on it, then pressing the red Delete button, then re-uploaded following the steps below.)
Adding a New Custom Form
- To add a new Custom Form that is an Editable/Fillable PDF, click on the “Custom Form” button on the right. (Please note: in order to utilize the meta-tags to pre-populate information, you will want to ensure the PDF you're about to upload it already editable/fillable. If it is not an editable PDF, it will function the same as the current Custom Form functionality.)
- .
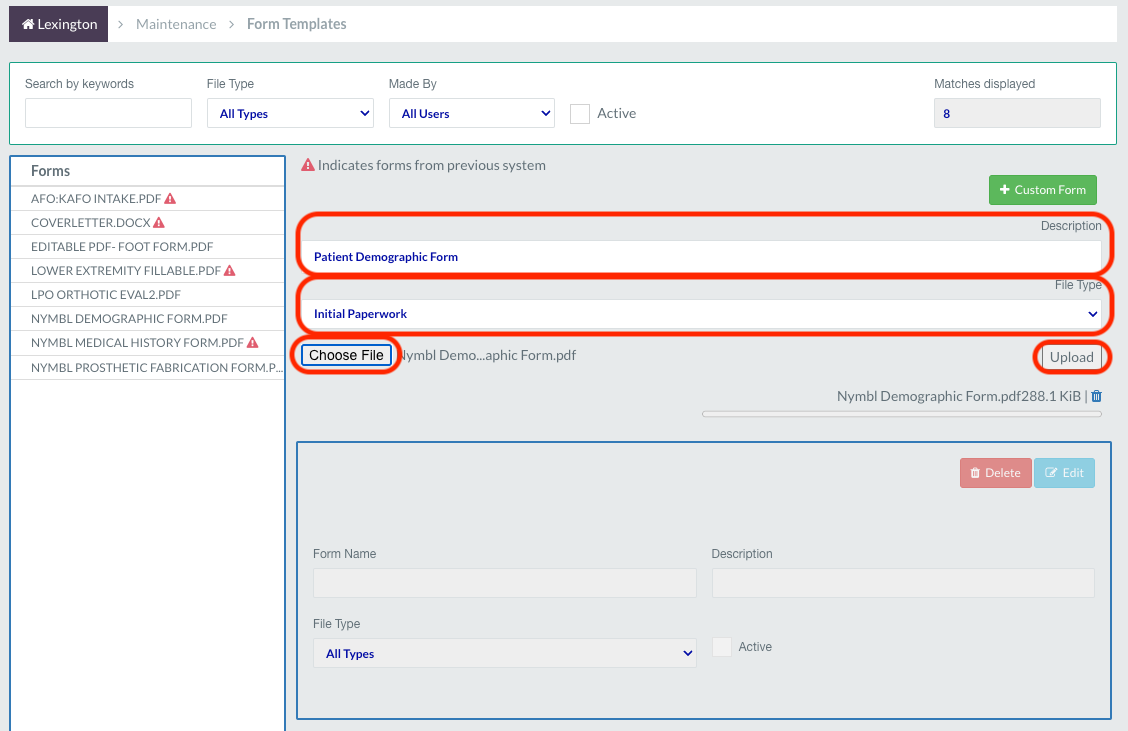
- Add the Name of the form in the “Description” field.
- Select the “File Type” category you'd like the filled out & saved form to appear as. (Reminder: You can add your own file types under Maintenance > Templates > File Type Templates.)
- Click “Choose File” and select the editable PDF on your device you'd like to upload.
- Then click the “Upload” button that appears on the right once the form has loaded, then the form will appear in the list on the left.
All fields can be edited after uploading except the form/file name, form/file name must be unique. Once the form has been uploaded, it is ready to be used as an Editable PDF in the patient's chart.
Creating an Auto-Populating Custom Form
If you would like to auto-populate patient's information onto the form in certain fields, follow the steps below to add the meta-tag mapping.
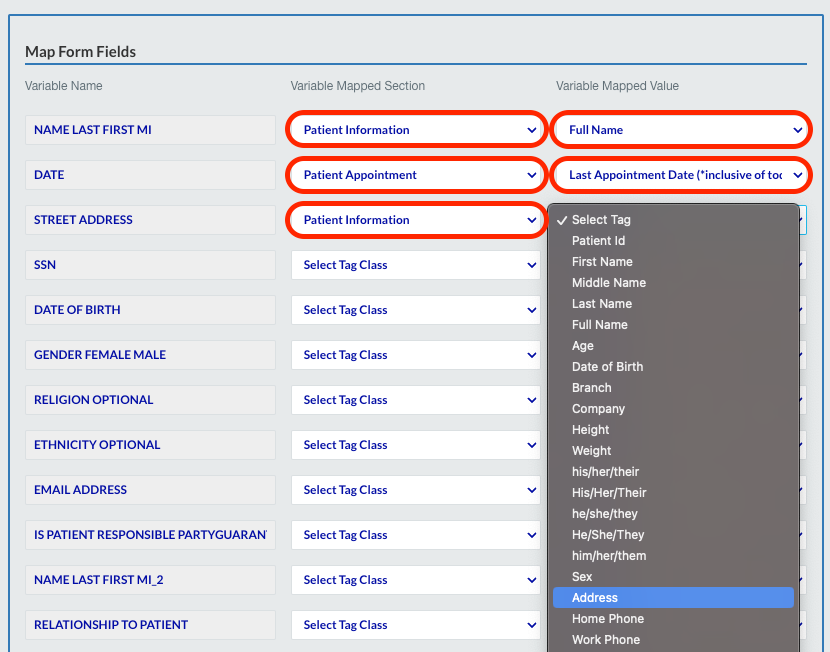
- After initial upload, you can directly start mapping fields, the system will identify all fields on the form that have been made editable and be listed under the "Map Form Fields". (Please note: These field names are directly related to the name of the field entered when creating the editable PDF & not the field name showing on the form. You can edit this PDF in Adobe and update the names of the text boxes if they are not all named properly, then re-upload the form if needed. It will also show in the order of how the text boxes were created.)

- .
- Under each field, you can select the “Tag Class” & “Tag” (exactly like the Note Template meta-tags) for each field. (Please Note: We are creating an extensive list of fields to add to our meta-tag list so this is not the final list.)
- .
- .
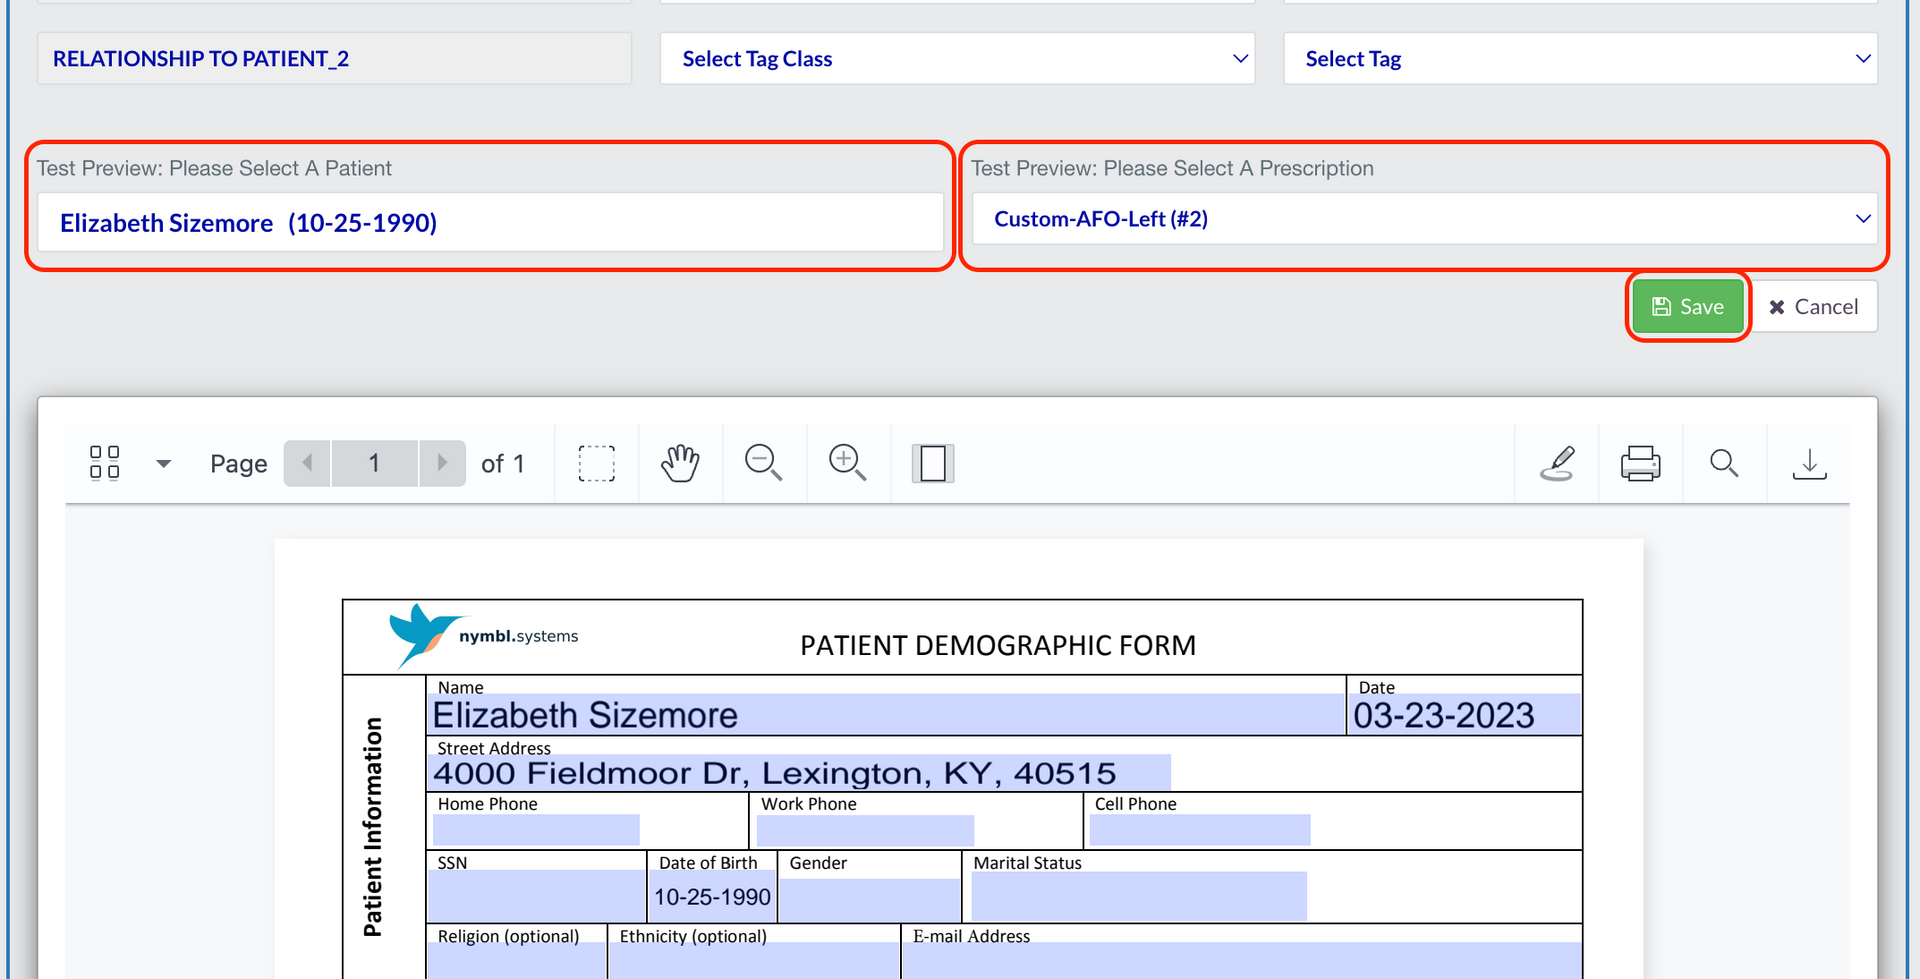
- If you scroll down to the bottom, you will see an option to preview the form, including the ability to add a patient & a prescription to it to see what it will look like when it is pulled into a patient's chart as a preview.
- To save the meta-tag selection, click the “Save” button at the bottom or top.
- .
- .
- .
- .
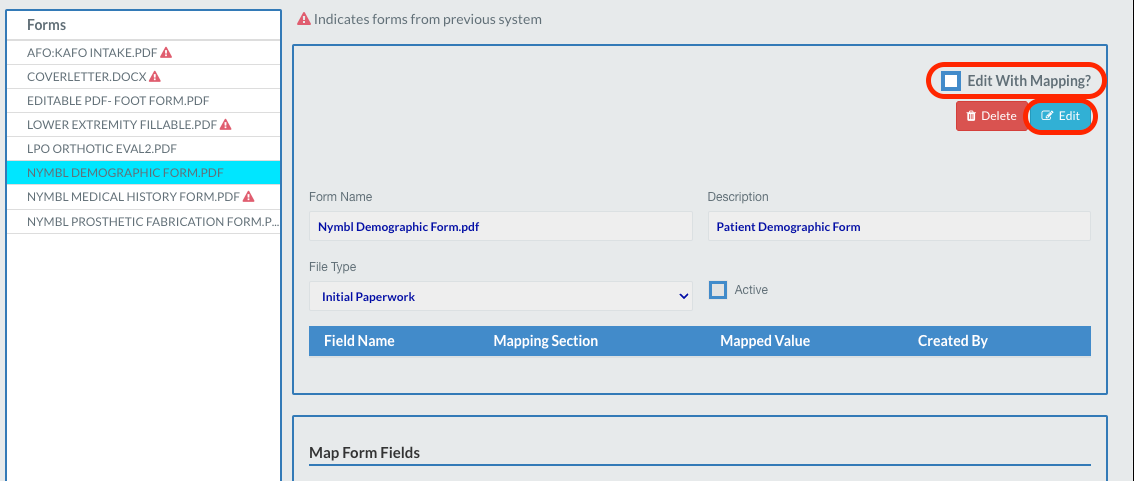
- If you need to come back and map more fields at a later time, click the "Edit with Mapping?" checkbox, then press “Edit”. Then you will be able to continue mapping fields.
Utilizing the Custom Forms in the Patient's Chart
In the “Patient's Chart”, under the “Forms” tab, you will see a few changes:
- The green “Custom Form +” button is no longer available here. Any new forms will be added in the Form Templates page of Maintenance now.
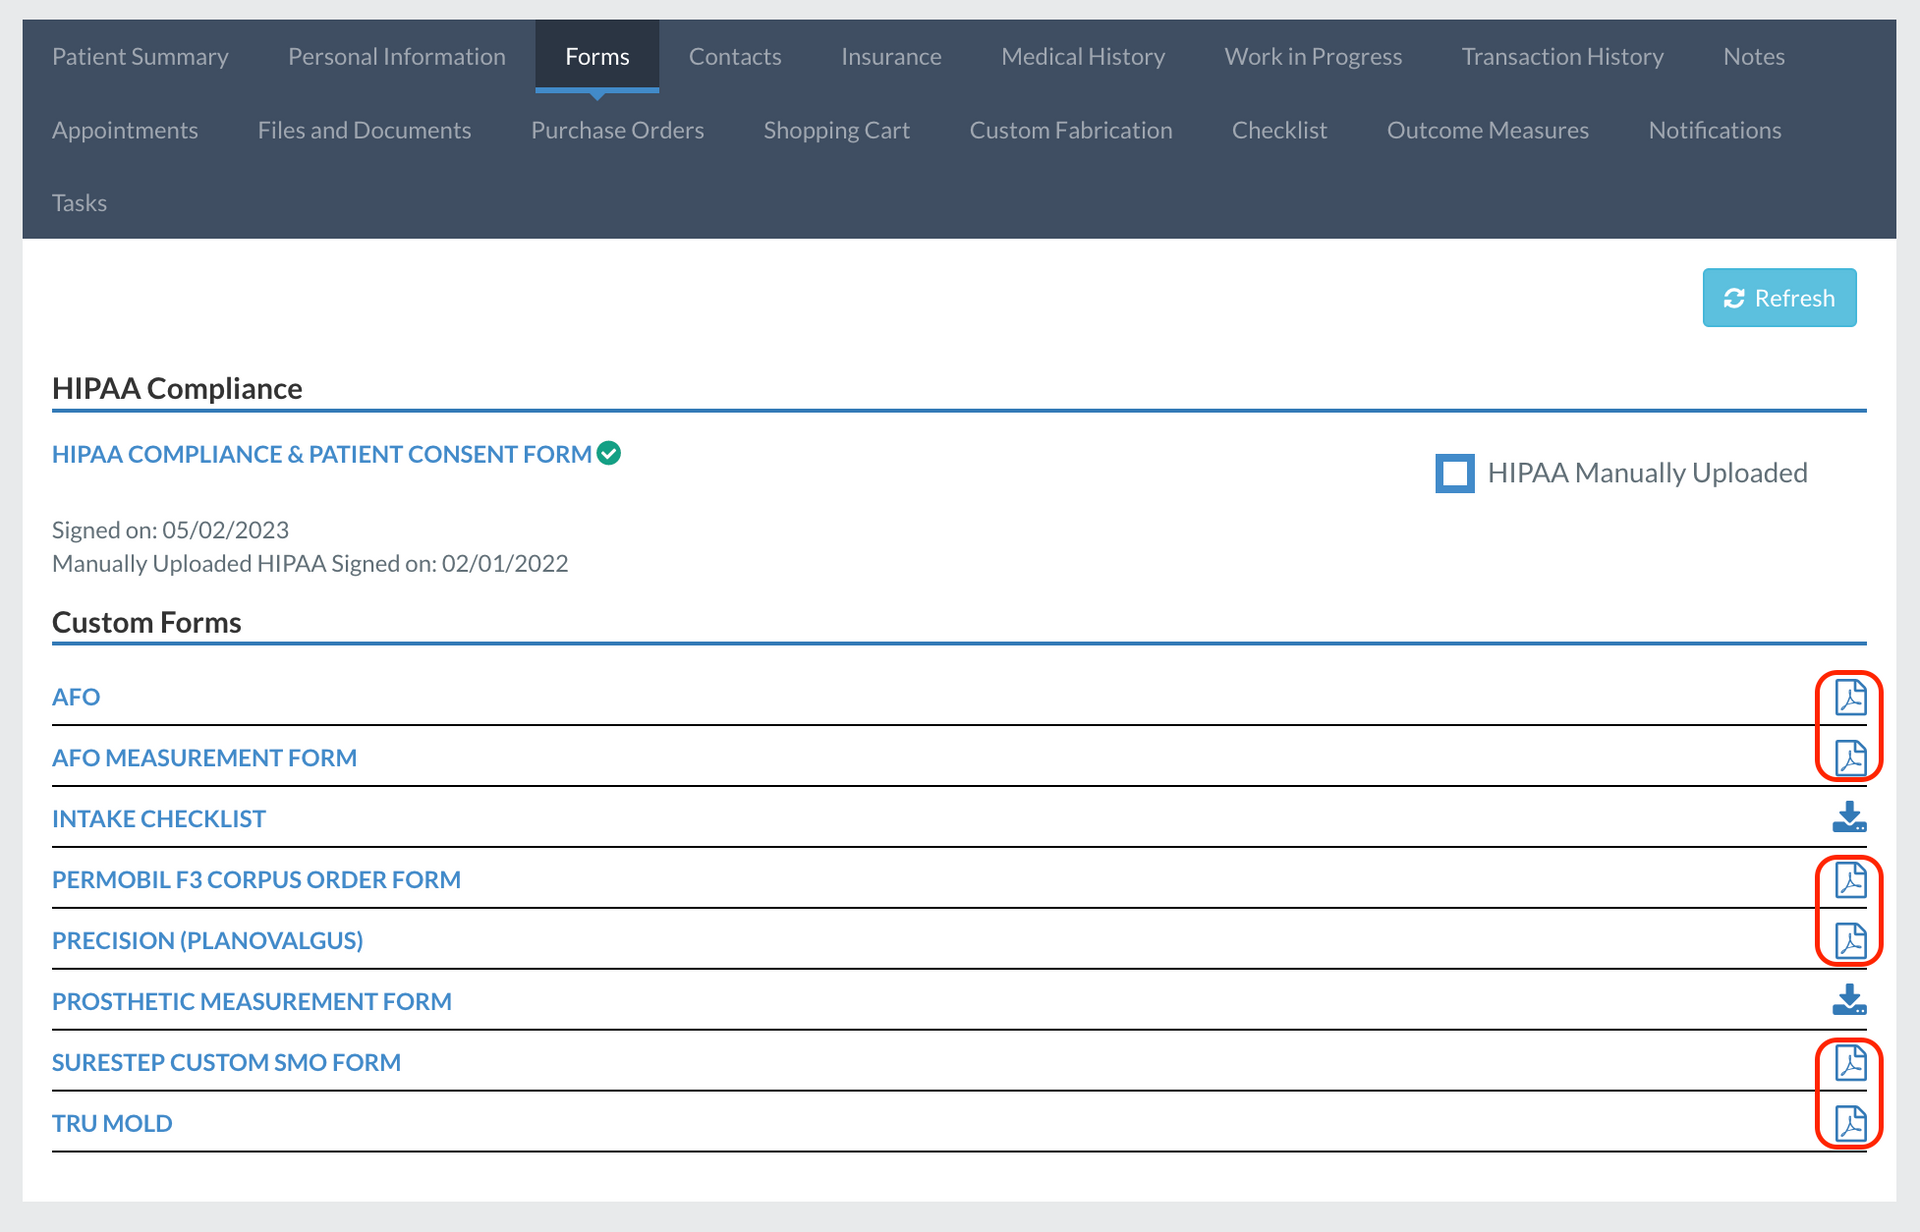
- You will still see all “Custom Forms” uploaded. However, there is a “PDF icon” next to any that can be edited & saved in the patient's chart.
- The non-editable forms can still be downloaded as they previously functioned.
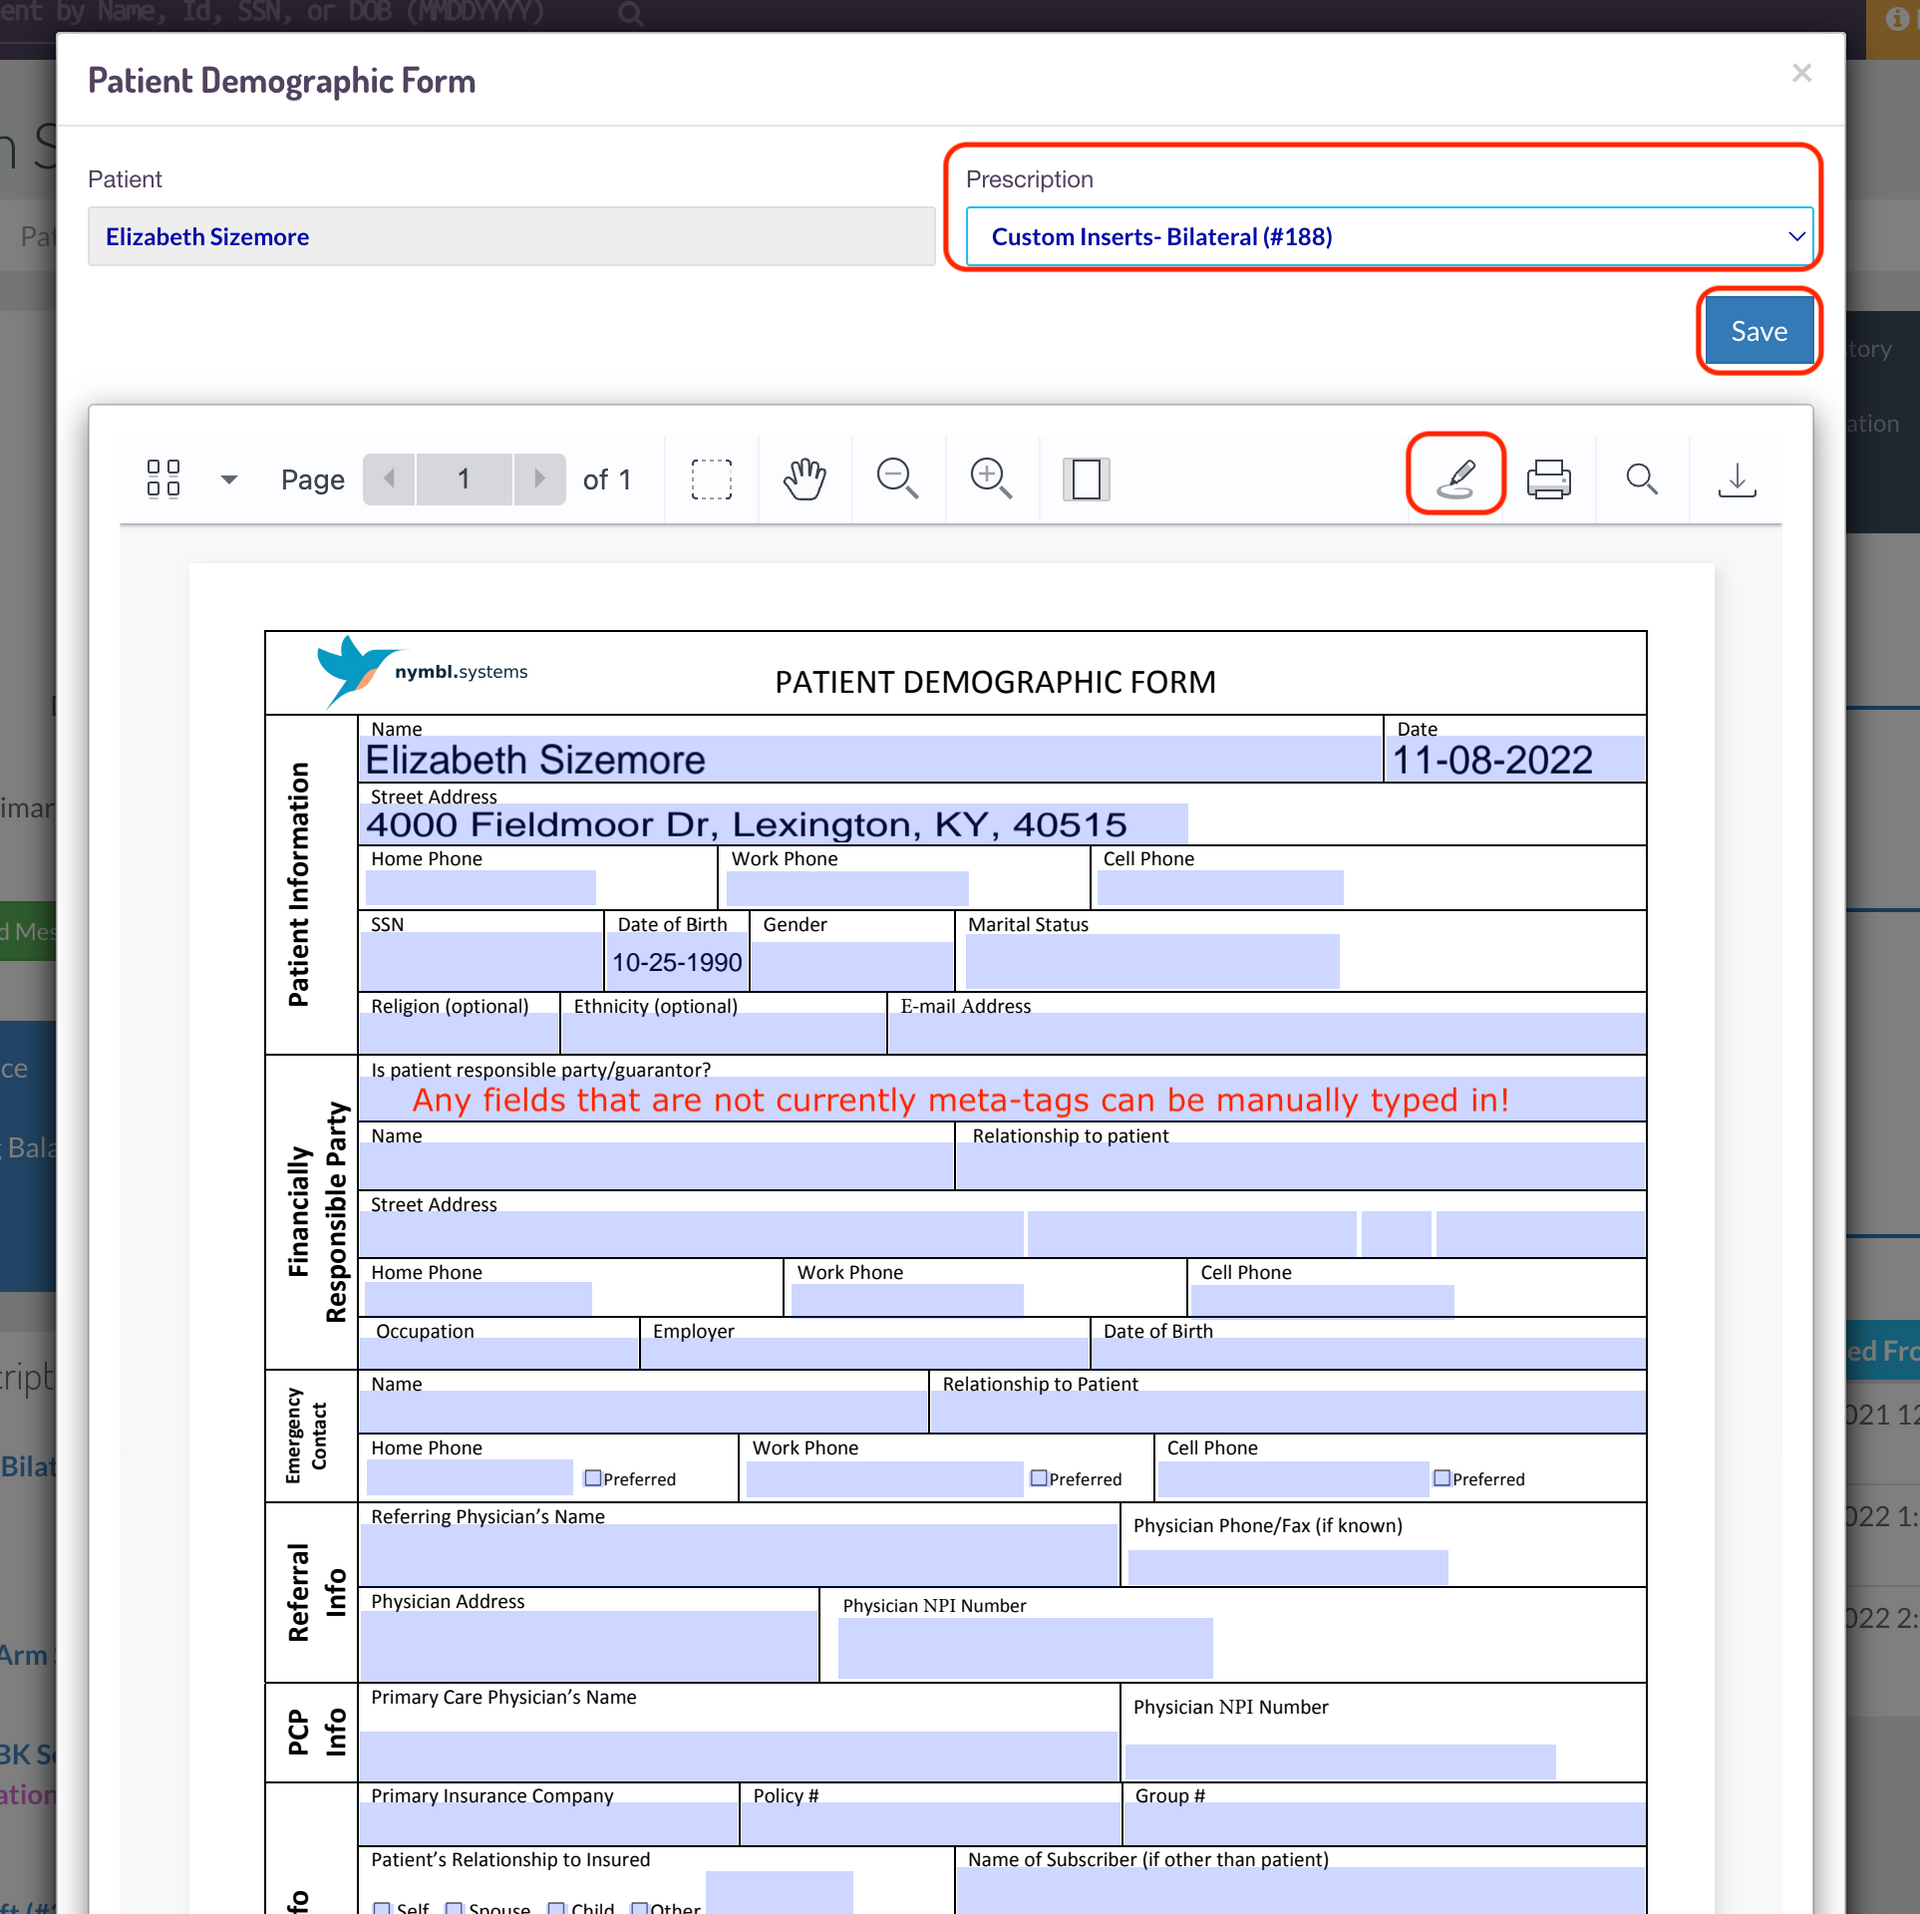
- Click on the pdf icon on the right pictured below. (Please note: Clicking on the name of the form will just open it in a new tab & will not auto-save into Nymbl or populate any data. You need to click on the PDF icon for this functionality.)
- .
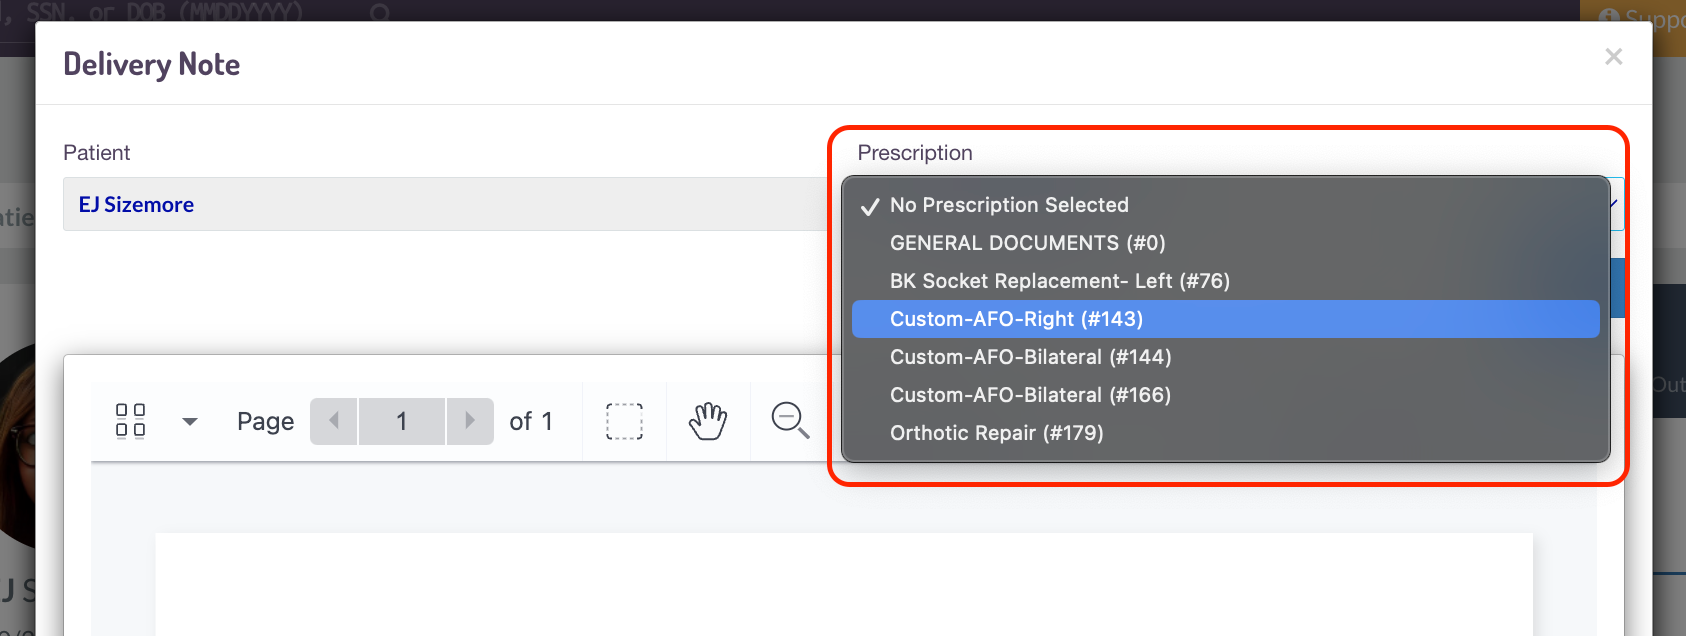
- In the pop-up, you will select the prescription this form is for or select “General Documents” if it does not need to be tied to an Rx.
- .
- .
- Review any of the fields that pre-populated information based on the meta-tags.
- Free type in any fields that did not have a meta-tag mapped to it. For any forms that have toggles, checkboxes, and drop downs, you can select those too.
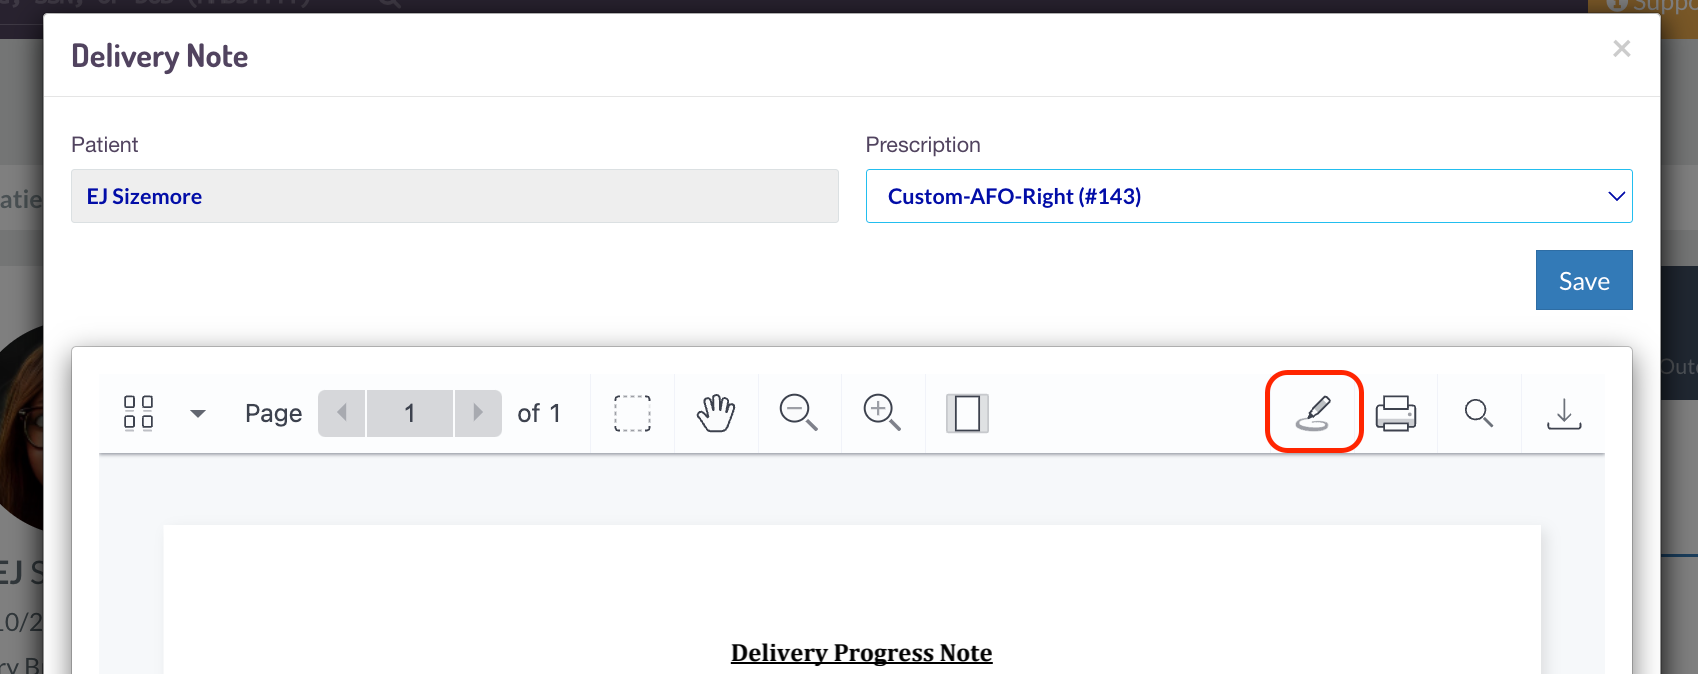
- You can add a “signature” and utilize other tools like adding additional text boxes, uploading images, and other tools by clicking on the pen icon next to the printer or download option.
- .
- .
- .
- .
- .
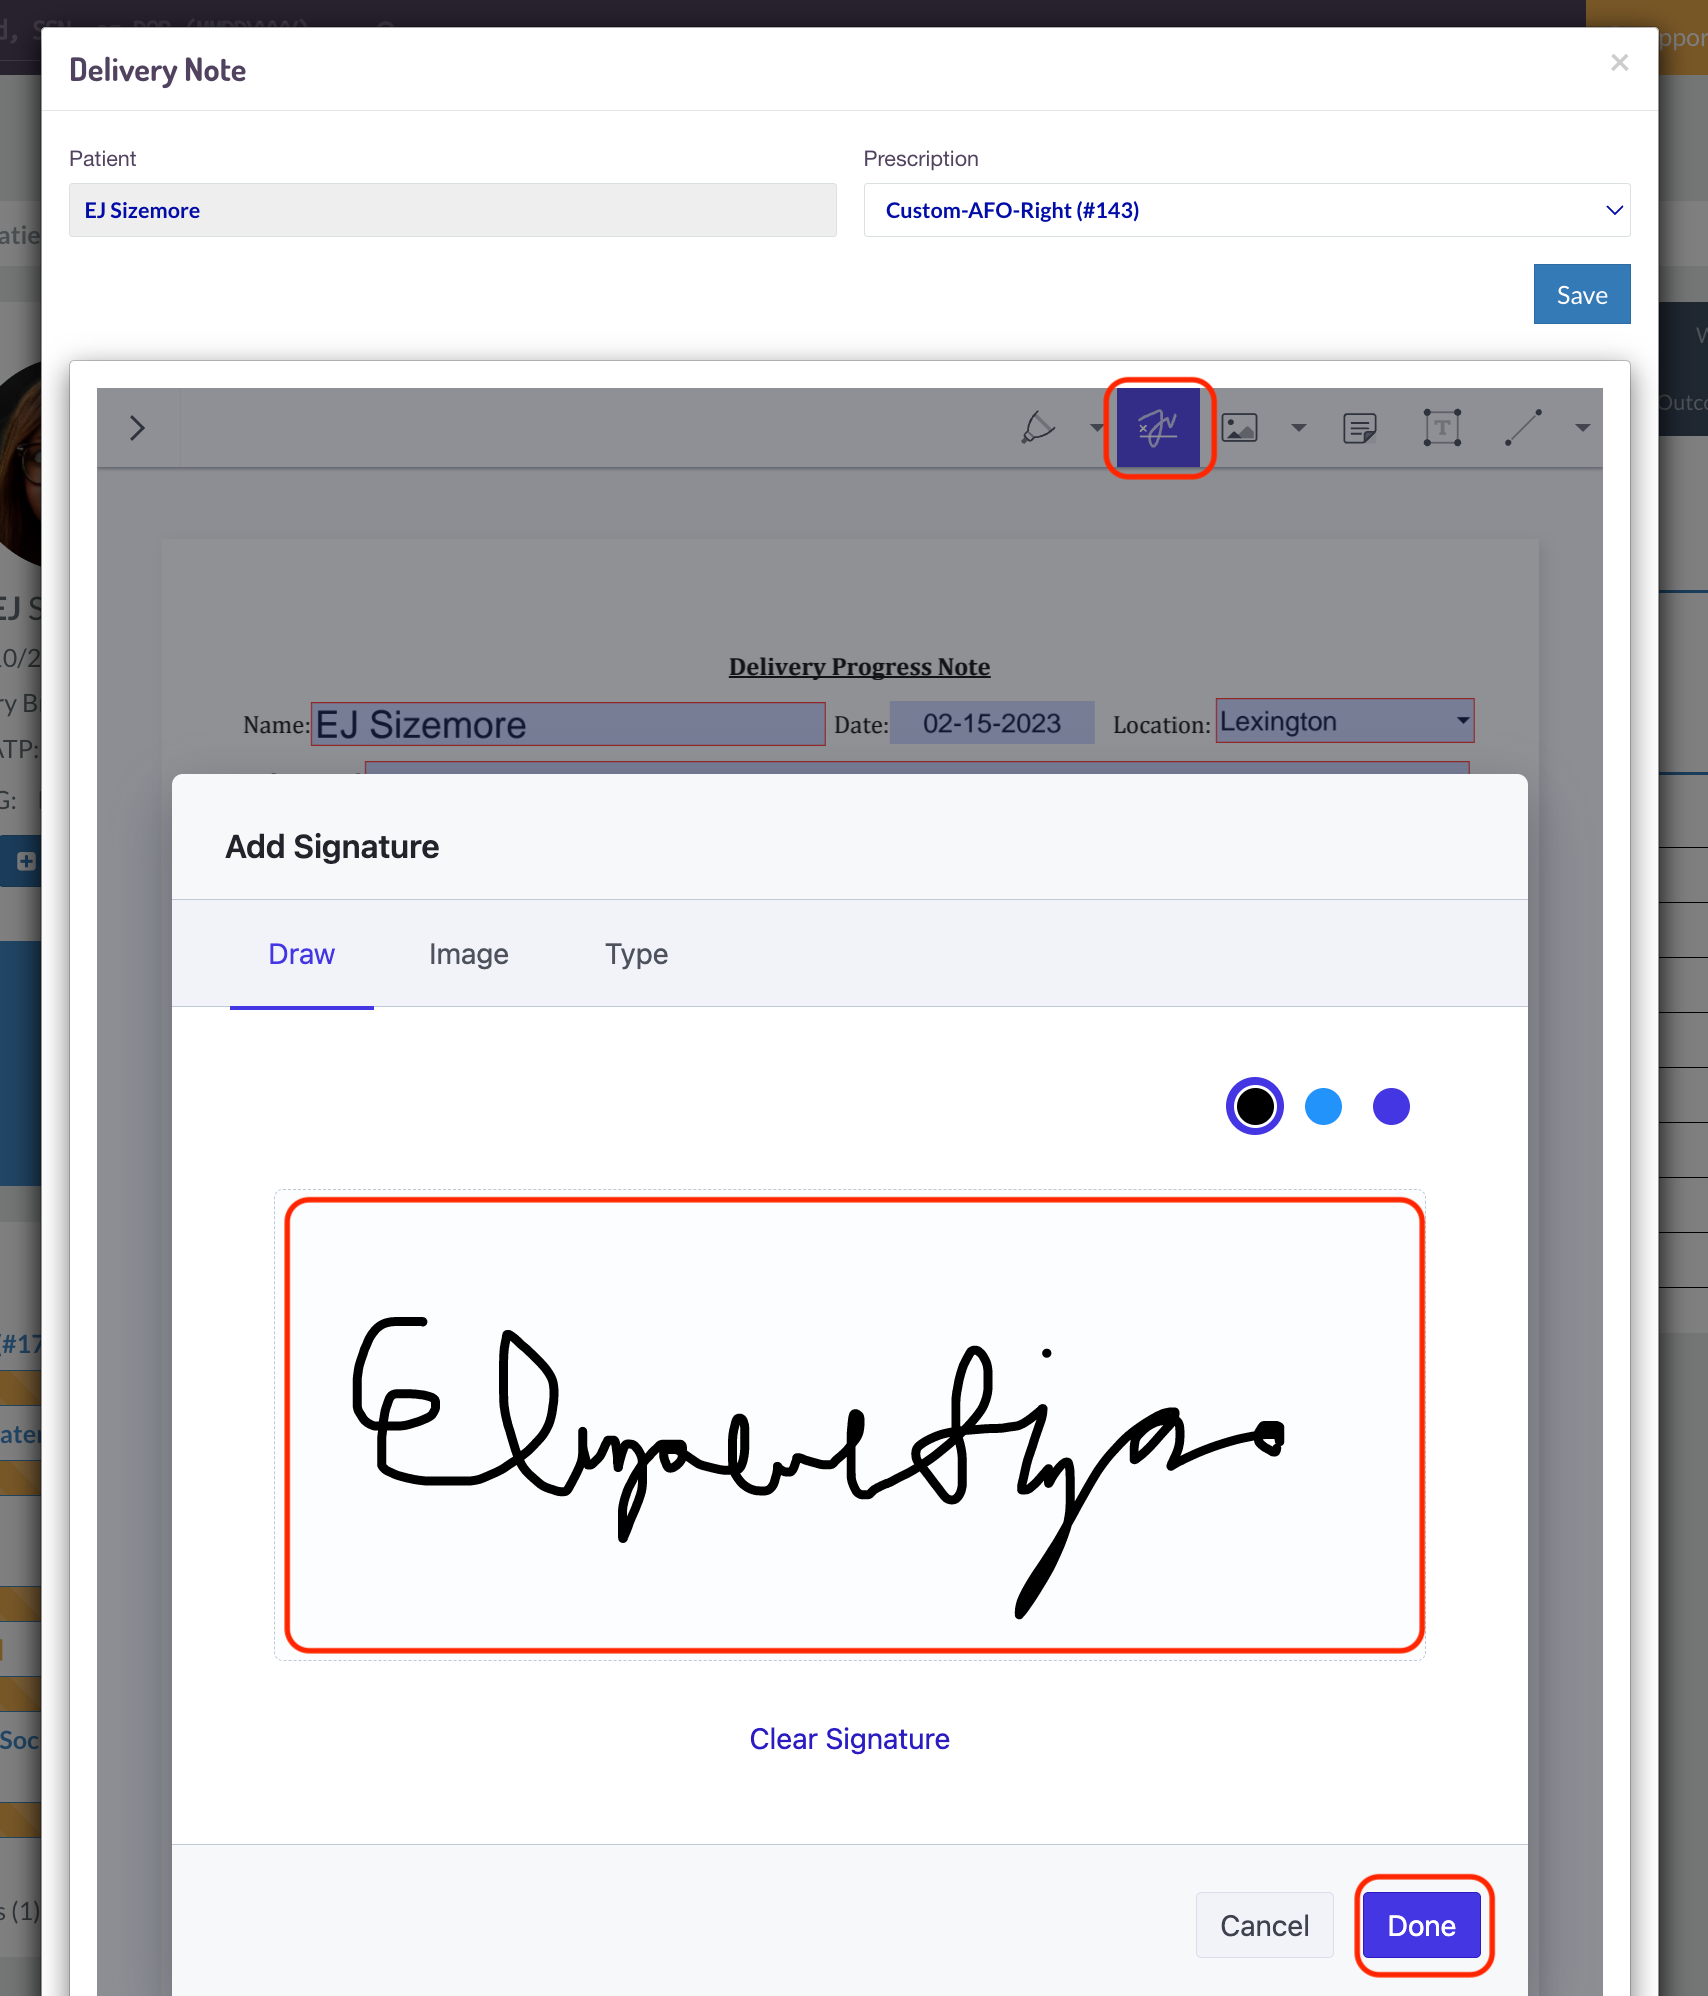
- For adding a signature after selecting the button above, click on the signature icon pictured below, which will bring up a box like this to sign.
- .
- .
- .
- .
- .
- .
- Once you press “Done”, you can re-size your signature and drag it to the signature line on the form.

- .
- .
- .
- .
- .
- .
- .
- When you have completed the form, press “Save”.
- .
- .
- .
- .
- .
- .
- .
- .
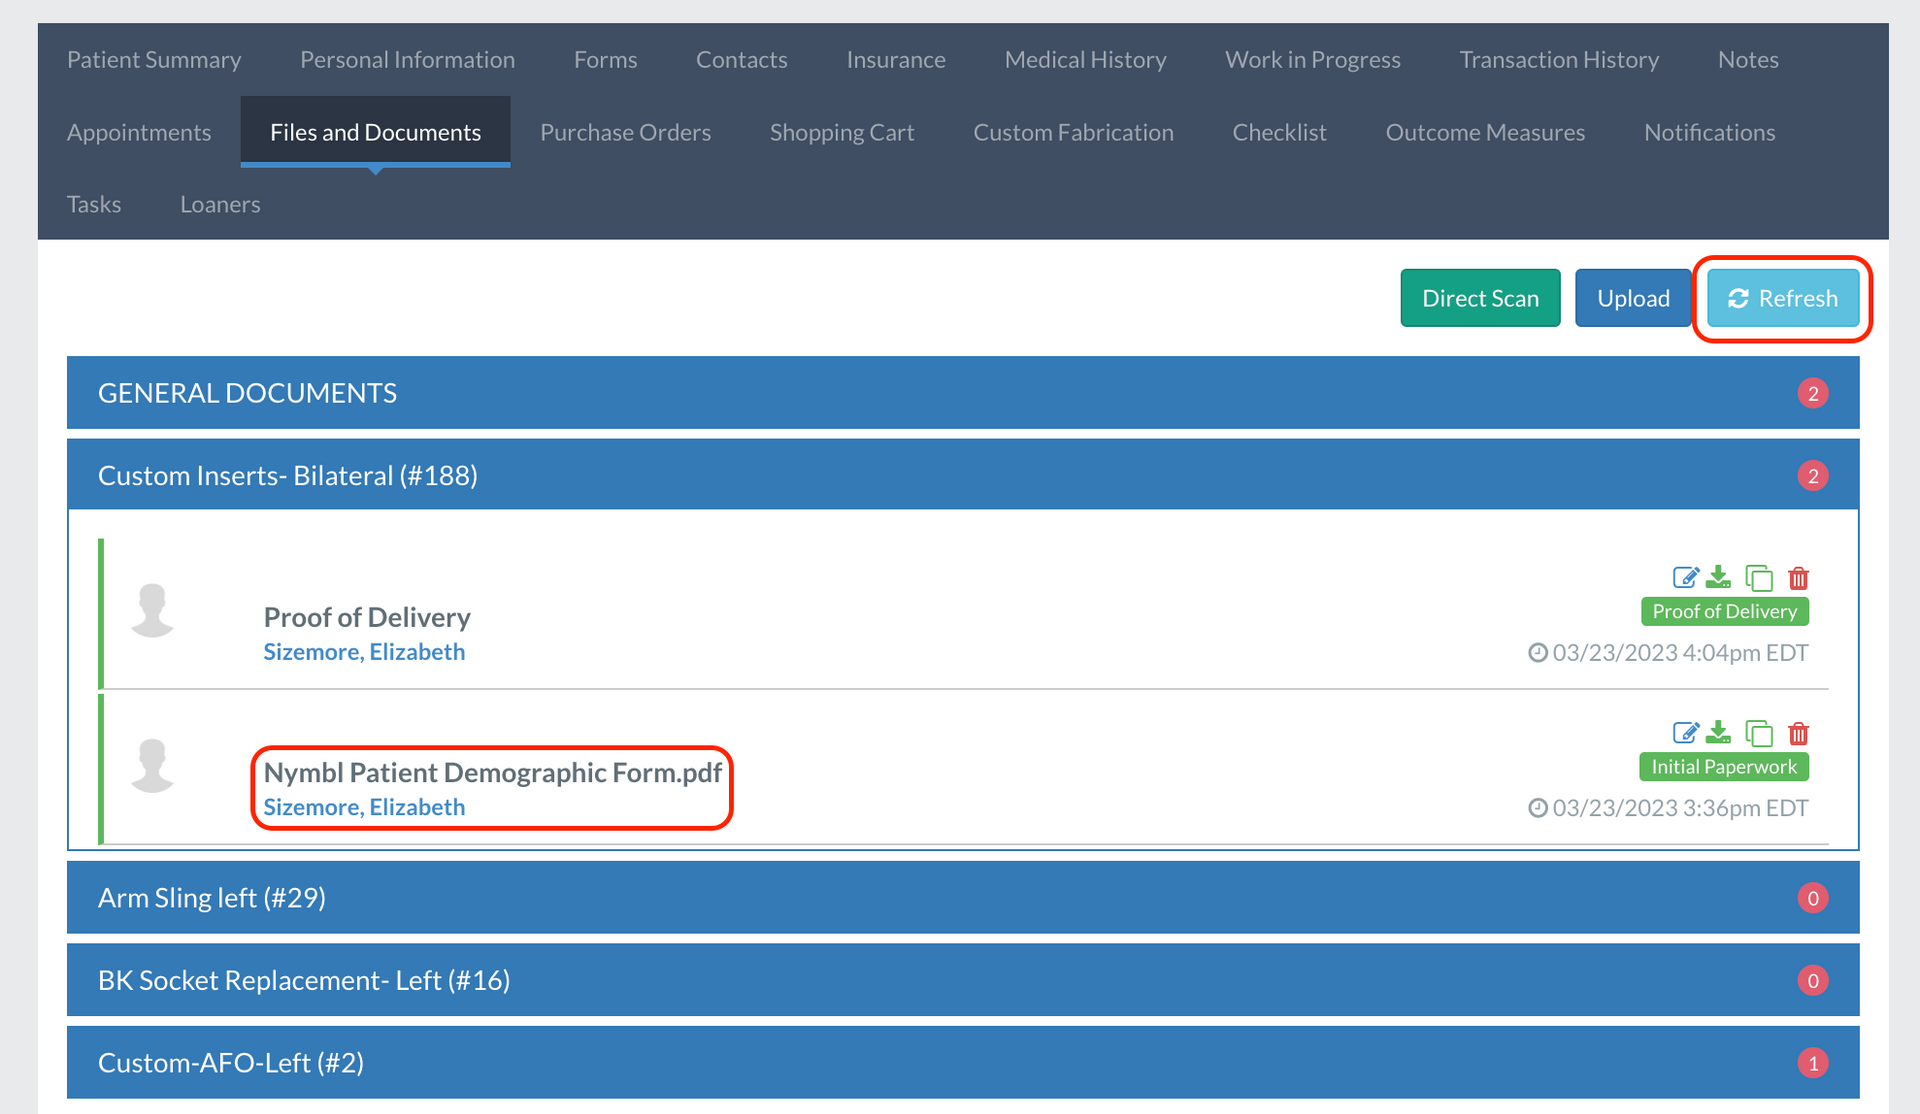
- Once saved, you can go to the patient's “Files & Documents” tab under the section you selected above and will see the form. (You may have to hit the Refresh button to see it.)
- If you click on it, it will open the form as a saved PDF in a new tab.
Please Note: This feature is only included in the current Elite & Professional packages and can only be enabled by a Nymbl staff member. Please contact us if you have questions about your access to the PDF Custom Form Builder feature – we’d love to help!